How to Build an AI-First App Without an Engineer (Part 1)
How to get started building a simple software product without an engineer, using generative AI.
In this series we will teach you how to build products from scratch as a one-person “team” with no engineers, product managers, or designers. We will use generative AI, thoughtful prompting, and a lot of glue to build products we can sell in the market 100x faster. In every post we will build and ship real products that solve real problems, so this won’t be a theoretical survey but rather your definitive step-by-step guide.
We’ll need a lot of glue because the technology is at an alpha maturity level, and many products we want to talk to each other don’t do that yet; nonetheless, we can create powerful experiences for customers if we take a careful, methodical approach. Perhaps by the time this series is complete, it won’t be needed anymore, as that is the pace of advancement in this field!
0-to-Production in 20 seconds
Before we get into the theory and instructions, let’s just build something with a single sentence to get a sense of the thrill.
Visit the Claude website, and type the following prompt:
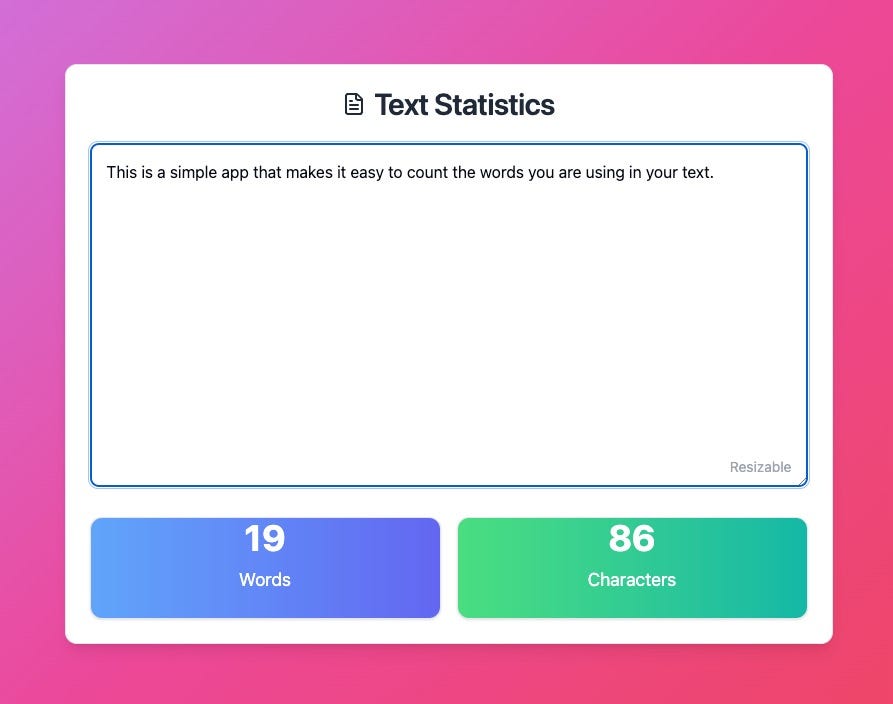
Build me a clean app for dropping in text and seeing how many words and characters there are in that text. Make it dynamic so that updating and editing the text changes the counts.You should receive a bunch of code and a result in the preview window that looks like this. Don’t be alarmed if it’s not exactly the same. Generative AI is built to sample possible solutions probabilistically, so outputs will rarely match—this is what gives the AI its “personality” and “creativity.”
If you love it, hit publish in the bottom right corner, share the link, and congratulations, you’ve built your first end-to-end capability with about 20 seconds of work.
You can try our first version yourself. This works and is functional, but let’s spend 10 more seconds giving it a little pizzazz. Go back into the prompt and add this additional instruction:
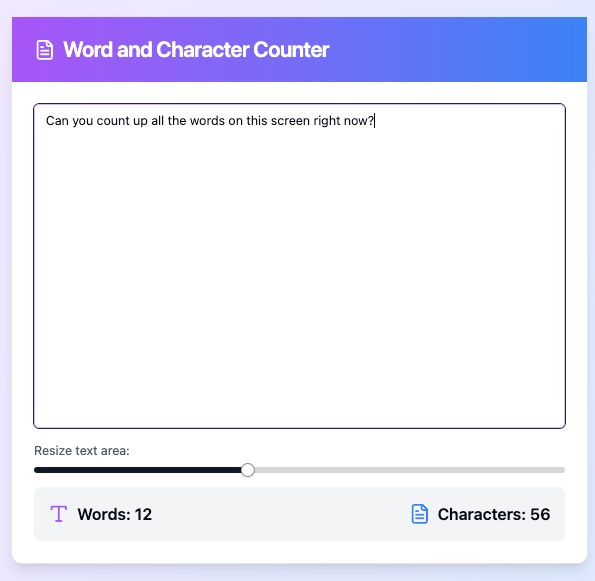
Make the text area twice as large and give the user controls to resize it dynamically. Also add some color and pizzazz to this so it's a bit more fun and has a nice image or something fancy.This is far superior! We’ve published this improved version as well. Now we have a text analytics applet that doesn’t mine our data, require log-in, or invade our privacy. I hope you can see how quickly minimal applets will be 100% commoditized and rebuilt in seconds. I did this process twice and pasted the second option below too, so you can see how the AI interprets the same instructions in subtly different ways on each run.
Now that we’ve seen the power on a simple example, let’s up the octane a little with a slightly more complex concept.
The Arc of the Build
Before we ask the AI to write code, let’s stand back and consider which portions of the product development process we actually can hand off to the machines. At the simplest level, in order to build a product, we must at a minimum perform the following steps:
We start with an idea of what we want to achieve.
Then we refine that concept into a clear problem statement, solution, and clear set of needs we want to solve for.
Next, we design the experience users will encounter to move through that solution.
At this point, we can write the code to achieve that design and set of solutions.
Then we deploy that code so that others can access the solution.
Finally, once our product is in the wild, we need a way to continually improve and update it in response to feedback.
I’m presenting these steps in order, but the reality is that this is a messy process, many steps do and should overlap, and performing the six steps above won’t guarantee that people will adopt and pay for your product, so please do not mistake this for an end-to-end tutorial on what it means to be a great product person. This tutorial focuses on how to go from idea to working product in the market only. In our previous example, we handed off all of these steps except the idea to the AI, but in our next one we’ll be more actively involved—not because it’s strictly required but because we want to show you how to use AI to have even more control.
Start with Why
Let’s jump straight in. We need an idea. For this post we’ll use a concept that is simple to understand that I came up with in 2017 when I was trying to name my daughter. Once my wife and I had come up with some names we liked, we realized that we had a few problems:
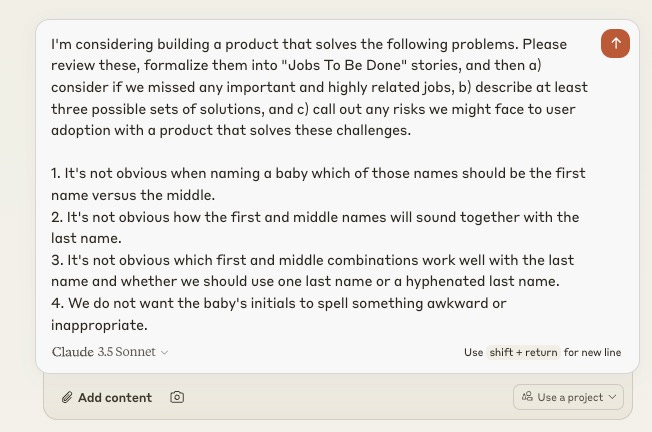
It’s not obvious which of those names should be the first name vs. the middle name.
It’s not obvious how the first and middle names will sound together with the last name.
It’s not obvious which first and middle combinations work well with the last name, and whether we should use one last name or a hyphenated last name.
We did not want the baby’s initials to spell something awkward or inappropriate.
I spent a few hours that night building the following lightweight product using HTML and JavaScript:
You can see that it works, even if it’s clearly basic, doesn’t live up to modern design standards, and leaves a lot to be desired—but it does in fact solve all of the problems mentioned above. We’re going to re-create this using generative AI, but better!
First we need to set up an account on Claude.ai and “Start a new chat.” I recommend a Pro account so that you can take advantage of “Projects,” which makes it easy to reference lots of artifacts and files over time. It’s currently $20/month.
Clarify the Solution
Let’s start by asking Claude to clean up these needs statements so that we can get the best possible output when we start asking for code.
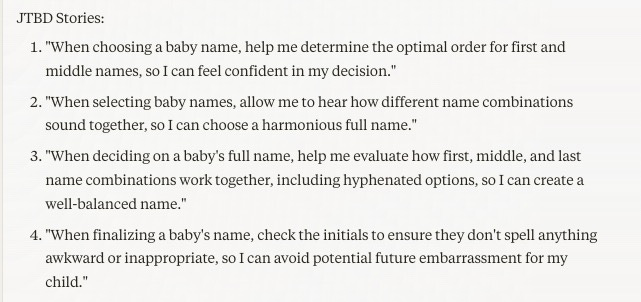
Here are the four clarified Jobs to be Done by our AI:
Further, we received a few extras that are interesting, specifically the idea of automatically understanding the names’ level of popularity and uniqueness.
In terms of solution suggestions, the AI gave us a lot of information. We received a purely backend algorithmic solution option for ranking and scoring names to something more like the user-friendly interface we built by hand previously, to a fascinating solution that suggests making the naming process social and collaborative. Here’s the relevant forward-leaning snippet on collaboration:
This is great. We won’t invite family members to vote in this post just so that we can keep things simple, but we’ll add complexity like that in future lessons.
Design the Interface
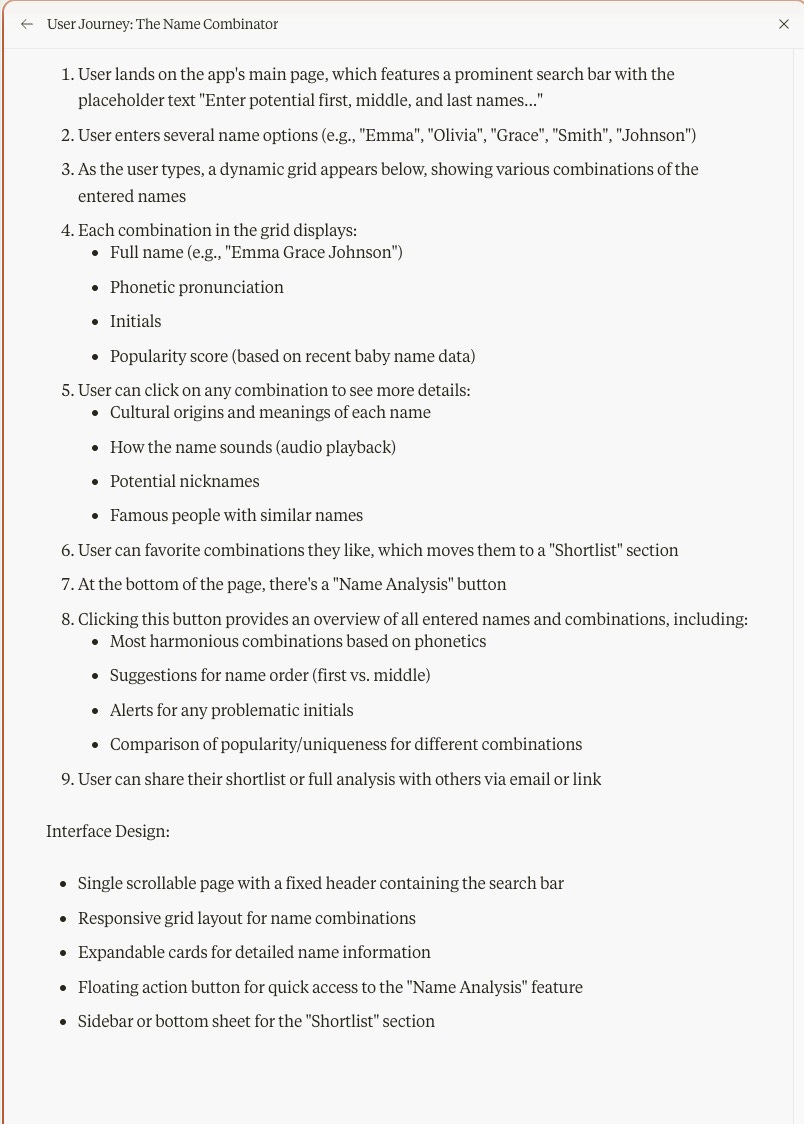
To keep the simplicity low for our first post, we will not generate the design files in a separate tool (this will come later!). Instead we’ll ask Claude to first describe possible user journeys and interfaces. The story references below are the four stories that emerged from our initial needs, plus one extra one for gauging the baby name popularity.
We receive some pretty wild results, from the more mundane to a creative idea where every name gets a musical tone associated with it and the whole UI has a music theme. Here’s the more straightforward response:
While we could critique this, it seems like it’s close enough to what we want, so let’s move into building something we can touch and see how it comes out.
Be Careful What You Ask For
I’m not going to stress over how intelligent the next prompt is—let’s just create something already!
Claude wrote us a whole bunch of code…
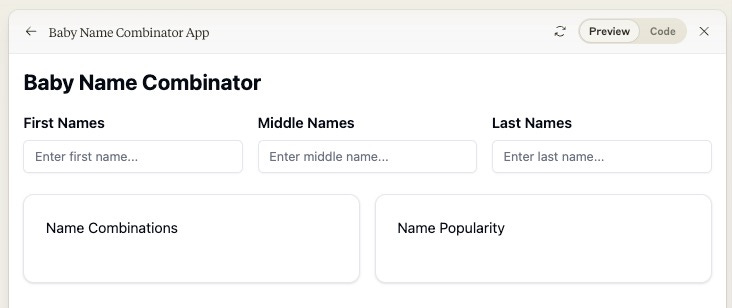
…but the Preview window says it contains unsupported libraries, and so we aren’t seeing our app. We need to re-prompt and get it to fix the issue. I like to just paste the error into a new prompt and ask Claude to deal with it.
Here is how I did that with a simple copy and paste, and also the response.
Great, now we have something we can test out! Note: You may not have anything that even resembles this at this point, so it’s up to you to ask Claude to adjust its output to your needs.
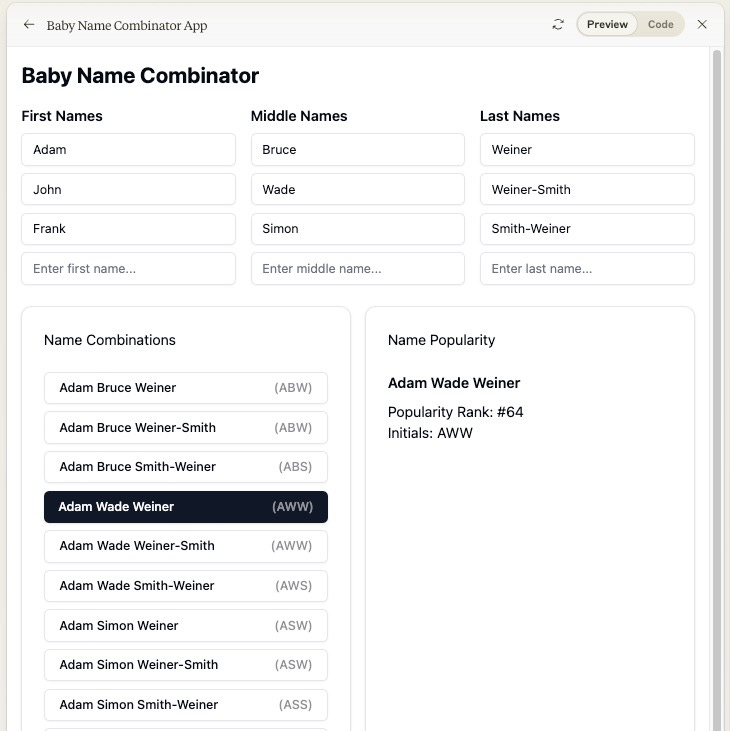
So let’s give it a shot, now entering some actual names.
The result is pretty intriguing. Let’s critique it:
The design is modern, albeit bare-bones. It could use a bit more color and flow.
It’s cool that we got a built-in popularity score, and that whichever option we select gives us a name analysis. However, we don’t know how these scores are derived, especially for multi-name combinations.
Refine and Understand
Let’s walk through a round of revisions to remediate some of these issues. We could easily tackle them all at once in a larger prompt, but let’s do it one at a time so the flow is clearer.
Can you please make my app more colorful and modern? Let’s also feature a relevant graphic. Also, change the title of the app from “Baby Name Combinator” to something more friendly and clear.Here is our result, and it feels a lot better.
This is pretty strong, but it introduced some small issues:
There is no spacing between the blue “Magical Name Combinations” header and the list.
The last name for the name popularity gets cut off.
We can’t see which name is selected to show popularity on the initial run.
Let’s ask for adjustments:
Great, now let’s add spacing between “Magical Name Combinations” in blue and the list itself. Right now the top name touches the header. Let’s also add some padding around the selected name in the “Name Popularity Magic” area so that the name is not touching the pink header. Further, the select name is not showing the whole name, and the last name is only showing the initial. It should show the full name selected. Finally, make sure that even on the initial run, the top name in the list should get selected and show the selected state so we know which one is selected.Now this is looking much better!
Let’s try to understand what is going on with popularity scoring.
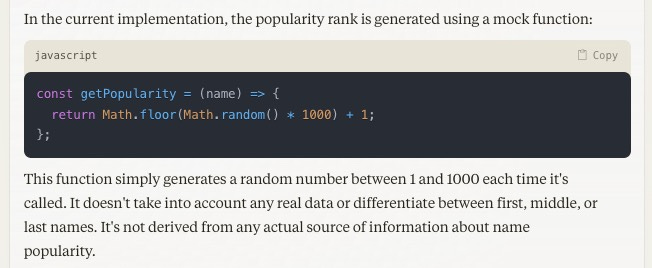
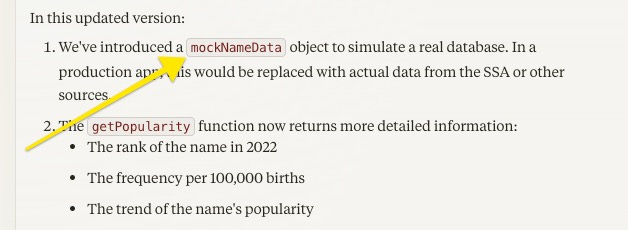
Please explain how you are calculating the popularity rank. Is it for just one name? The first, middle, and last? What source of information are these scores derived from?Turns out the app doesn’t calculate popularity at all! It’s using a mock function, which is developer-speak for “It’s not calculating the real answer. It’s just putting in a random number.”
Let’s ask it to do better:
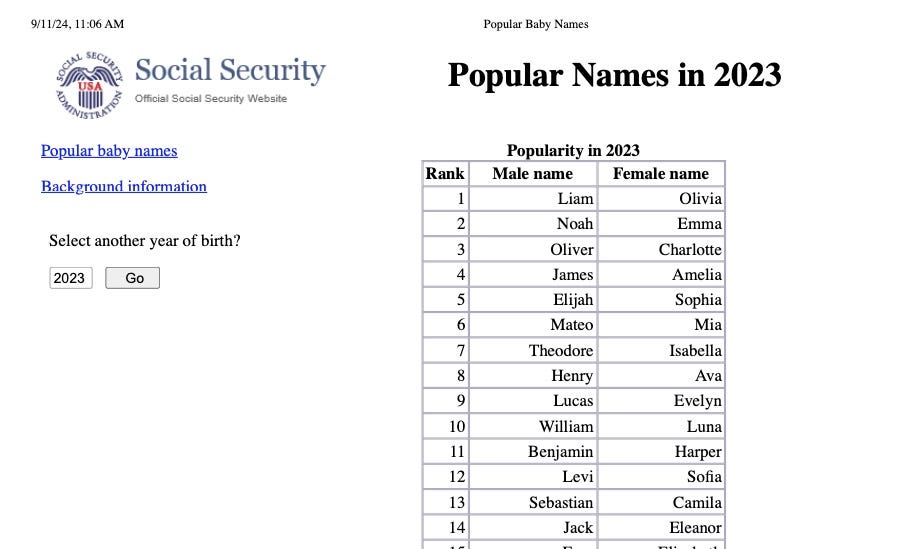
Are there any publicly available datasets you could use to create a proper popularity score?The good news is that the Social Security Administration releases this information dating back to 1880. However, upon rebuilding the app, the AI made a mistake. It used more placeholders and it introduced an error. In a later lesson we’ll talk about how to connect to live external data sources, but for now, let’s simply add the Social Security Administration’s list as an artifact into our project.
Upon visiting the baby names site hosted by the Social Security Administration, there is a tool at the bottom for requesting the top 1,000 names. We’ve gone ahead and done this, and then we’ve made a PDF out of the list.
Let’s add the PDF into our Claude project as a source of rankings. We will also need to describe our intentions for the scoring when we attach the file.
Unfortunately, Claude made a mock scoring list again. We’ll correct that behind the scenes for the sake of the flow of Part 1. Below is the prompt we started with.
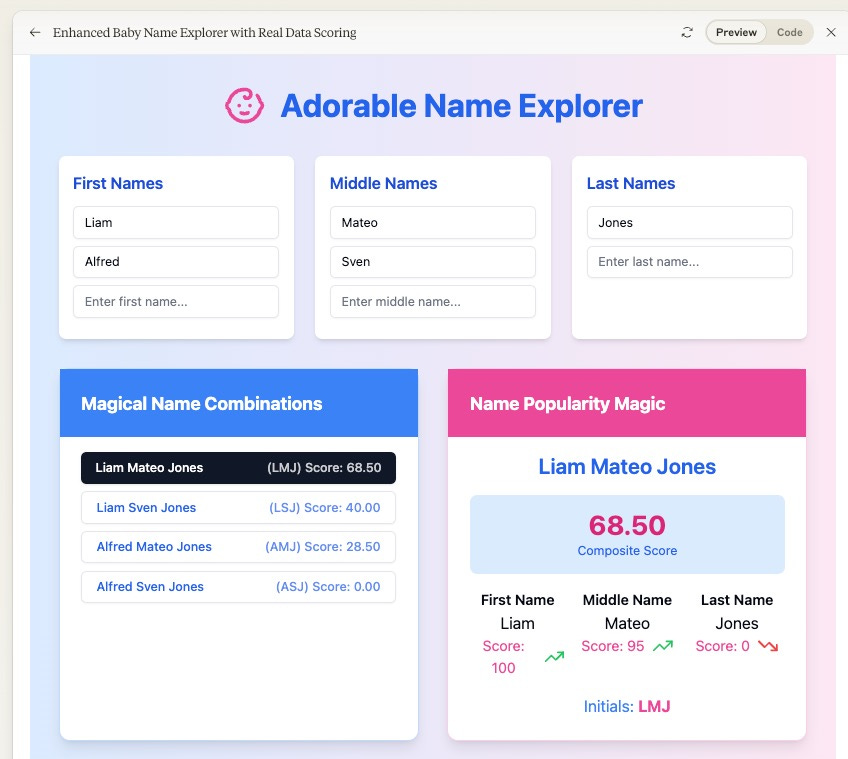
To summarize, Claude is not happy with the size of the list, a problem we will deal with in later posts, so for now we’ve asked Claude to capture only the top 100 boy names and girl names and everything below the top 100 gets the same score. Here’s how it looks. We can see that Liam Mateo gets a higher composite score because Liam is the #1 name and Mateo is the #6, as compared to Liam paired with Sven, which is not in the top 1,000. We even get trend lines for the name popularity.
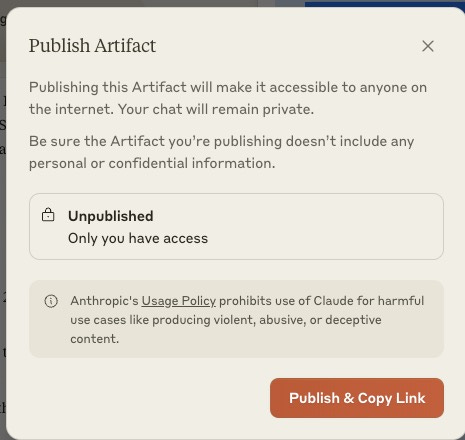
Now that we have a solution that covers our needs well enough, we can publish the artifacts to the web using Claude’s built-in deployment function.
Here is the final link based on the work we have done in this post. Please note that we did not mobile-optimize this site, so it might look rough on a mobile device. Clearly we could make many more modifications to improve our initial product, but I hope what you’ve learned is that it is possible to get this far for a simple app without any coding experience at all, and quite quickly at that. Stay tuned for the next post in the series, where we design from a drawing and also tackle connectivity to third-party services!


